Hot for Food – Chickpea Tuna Sandwich

I never liked tuna salad, but I like chicken salad, and this recipe was nice to find at a cheaper cost that still looked yummy. This recipe, much like the others, don’t have many ingredients to keep things simple.

Here is what you need:

  • 1 can chickpeas
  • 1/3 cup finely chopped dill pickle
  • 1/3 cup finely chopped celery
  • 1/4 cup finely chopped red onion
  • 1/3 cup vegan mayonnaise
  • 1 tbsp lemon juice
  • 1/2 tsp old bay seasoning (I used paprika instead)
  • 1/4 tsp sea salt
  • 1/4 tsp ground pepper

First, you rinse and drain the chickpeas. Once they are rinsed, you use a potato masher, or a fork in my case, to mash the chickpeas while leaving some in chucks, much like a normal chicken or tuna salad.

DSCF0482.jpg

You then simply put all of the rest of the ingredients in the bowl with the chickpeas and mix!

DSCF0484.jpg

It smells delicious and tastes great too! The one thing I would change is putting less pickles – it was a tad too sour.

You can enjoy this in a salad or on a sandwich, and then save the rest for the next day!

Verdict…WIN! These recipe was extremely easy, healthy, and created some leftovers – bonus!

I put this mixture in with spinach for my lunch for a delicious and flavourful salad!

DSCF0487.jpg

Original recipe: http://www.hotforfoodblog.com/recipes/2015/8/11/chickpea-tuna-sandwich

Hot for Food – Cauliflower Buffalo Wings

Ever since I found out that chicken wings can be made with cauliflower as a substitute, I wanted to try them. I found this recipe through the mention from someone at school, so I decided to have a go at them. The main thing I liked about this recipe, was that there were little ingredients and the battered mixture sounded delicious!

The only ingredients you need are:

  • 1 head cauliflower
  • 1/2 cup non-dairy milk (I used unsweetened almond milk)
  • 1/2 cup water
  • 3/4 cups all-purpose flour
  • 2 tsp garlic powder
  • 2 tsp onion powder
  • 1 tsp cumin
  • 1 tsp paprika
  • 1/4 tsp sea salt
  • 1/4 tsp ground pepper
  • 1 tsp butter spread
  • 1 cup Frank’s red hot sauce

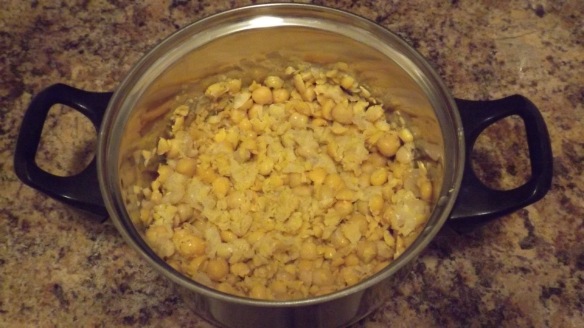
The first thing to do to make these cauliflower wings are to cut up the cauliflower in small chunks so that they look something like this:

DSCF0479

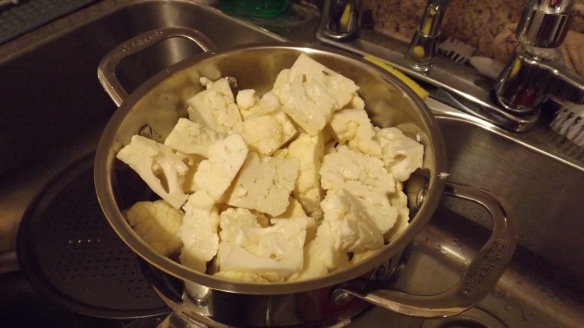
I rinsed them just to make sure that I wouldn’t be eating any dirt.

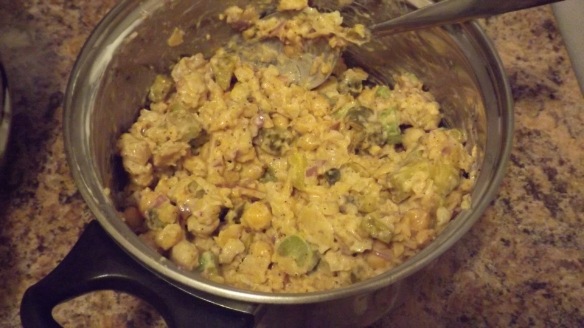
Next, I made the batter sauce that the cauliflower chunks would be dipped into. Therefore, mix together the flour, water, non-dairy milk, onion powder, garlic powder, cumin, salt pepper, and paprika so it looks something like this:

DSCF0481

The instructions state to ensure the mixture is not too thick that it doesn’t drip, but not too watery that it won’t stick to the cauliflower. Coat all of the cauliflower chunks with the mixture then put onto a cooking sheet with parchment paper. I didn’t have any, so I used tin foil, which didn’t turn out as planned.

DSCF0483

Now here is the part that I messed up. I only read on the recipe page that you cook these for 25 minutes, however it didn’t clearly state the temperature. So because of this, I just put the oven to a safe 375 degrees celsius and hoped for the best. Meanwhile, I figured out after baking these for 25 minutes that the oven was supposed to be at 450 degrees celsius. Apparently this was crucial so that the wings weren’t soggy.

I then covered the wings with the butter and Frank’s hot sauce mixture and put them in for another 25 minutes at 450 degrees celsius this time. When my boyfriend came home from work he said they smelled delicious, which they did, but they weren’t cooking the way I hoped they would.

In the end, the wings weren’t as crunchy as I hoped, but my boyfriend and I enjoyed them. We figured though that it would be better as a side than a main dish.

Here is the finished product!

DSCF0486

We paired the cauliflower wings with ranch dip and ketchup, as well as some carrots and pickles.

I’m not a huge fan of cauliflower, and we both found these to have the texture of chicken and really enjoyed the hot sauce!

Verdict…semi win. I think if I cooked them properly, they would have tasted better.

Original recipe:http://www.hotforfoodblog.com/recipes/2014/2/11/cauliflower-buffalo-wings

Test # 3: PETA – Easy Vegan Pad Thai

I love Thai food. It is one of my favourite foods and I just can’t get enough! I was craving some Pad Thai and have never made this before from scratch, because hello…I am not the best cook. I found this recipe on the web and I perked at the fact that PETA posted it. I never even knew they posted recipes. Pretty cool! I knew some recipes for Pad Thai, especially vegan, would contain a lot of ingredients so I was on the hunt for one that had few ingredients, but tasted delicious. I liked this recipe because I already had most of these things at home except for soy sauce, rice noodles and green onions. I’m not the biggest fan of tofu, which is included in this recipe, so I didn’t include that in my Pad Thai. I also doubled the recipe so I could have leftovers hehe.

So here is what you need to make this Pad Thai recipe:

  • 1 pack of rice noodles – I used a medium noodle
  • Green onion for garnish
  • 1/2 package of tofu
  • Chopped peanuts for garnish – I used cashews
  • 3 tbsp of sugar – I used honey
  • 2 tbsp peanut butter
  • 4 tbsp soy sauce
  • Juice of 2 limes
  • 2 cloves of garlic
  • 1 cup of water

What I loved about rice noodles is that it only took 3 minutes to cook! I’ve never cooked rice noodles before, but that’s way better than pasta noodles when I’m super hungry and ready to eat.

DSCF0473

It’s best to have someone help you so one person can focus on the noodles, and the other can make the sauce. For the sauce, all you do is put the peanut butter, soy sauce, garlic, sugar/honey, lime juice and water into a bowl and mix it up. You then put the sauce in the pot with the noodles and mix together.

While you are cutting the garnishes, ensure to cover the pot because rice noodles dry out fast. I cut up some green onions and cashews that looked a little like this…

DSCF0474

Place the garnishes on the serving of Pad Thai, and voila!

My verdict of this recipe…WIN!

Suggestions: There was a bit too much lime, so I would suggest to add lime to taste. If you have leftovers and you want to heat them up, make sure that you add some water so that the noodles don’t dry out. My boyfriend wasn’t a huge fan, but my sister came over and we loved it!

DSCF0475

View the original recipe here: http://www.peta.org/living/food/easy-vegan-pad-thai/

Test #2: All Recipes Canada – Quinoa Black Bean Burgers

I’ve always wanted to try making quinoa and black bean burgers since trying them at a restaurant this summer. I was surprised at how filling the burger was, yet it was not so heavy on my stomach like meat can be sometimes. I found this recipe through a simple Google search, and noticed the great reviews and ratings, so I decided to use this as my first go at a quinoa and black bean burger.

The recipe is quite simple. All you need:

  • 1 can of black beans rinsed and drained
  • 1/4 cup quinoa
  • 1/2 cup water
  • 1/2 cup bread crumbs
  • 2 tbsp minced onion
  • 1 large garlic clove, minced
  • 1 1/2 tsp ground cumin
  • 1/2 tsp salt
  • 1 tsp hot sauce (I used Sriracha)
  • 1 egg (or an egg substitute)
  • 3 tbsp olive oil

DSCF0453

The first thing you want to do is start cooking the quinoa. Add the quinoa and water to a pot and bring to a boil. Once it reaches a boil, you want to turn down the stove to a simmer and cover the pot until the water is absorbed.

While waiting on the quinoa to cook, you can place the black beans in a bowl (all I had was a pot) and mush the beans with a fork until it becomes a paste. Make sure to leave some of the beans whole to add more texture. They should look something like this:

DSCF0456

Toss the bread crumbs, onion, garlic, egg, hot sauce, salt, cumin and quinoa in the bowl and mix all of the ingredients together with your hands. The recipe called for yellow peppers, but I am not a huge fan of them, so I left them out. You may add in whatever extra flavours you’d like though to personalize them!

DSCF0458DSCF0457

Once all the ingredients are mixed together, heat up a large saucepan with the olive oil. Make the mixture into patties – as little or as large as you’d like. I was surprised that I got 5 large patties out of this recipe! Great for leftovers.

DSCF0464

Cook these guys up and you will have delicious quinoa and black bean burgers! My boyfriend, who is a meat lover at heart, really enjoyed these burgers and said they were a lot more filling then you think. These are high in protein so you will feel full, but good that you filled yourself with healthy foods! Here is a photo of the final product with a side of salad:

DSCF0468

My verdict for this recipe is…a huge WIN!

Make sure to let me know what extra ingredients worked for you, and how yours turned out!

You can find the original recipe here: http://allrecipes.com/recipe/220661/quinoa-black-bean-burgers/

Test #1: Oh She Glows – Homemade Chocolate Chip Cookie Dough Larabars

For my first recipe challenge, I wanted to start off easy. I was also in need of some healthy snack ideas that were different from the granola bars that I eat on a daily basis. I found these on the famous Oh She Glows blog created by Angela, and they looked delicious!

Here’s my go at the larabars according to her recipe.

What also attracted me to this recipe is that there are only four ingredients! Bonus! I gathered them all up from my apartment and started at it.

DSCF0433

All you need is a blender or food processor, cashews, vanilla extract, pitted dates and chocolate chips. You can easily find everything at your local grocery story, and for the yield you could get for all of the ingredients, it is cheap cheap.

Ingredients:

  • 1.5 cups raw cashews (230 grams)
  • 1/4-1/2 tsp fine grain sea salt (I didn’t use salt because the cashews I bought already had salt on them)
  • 1 cup tightly packed pitted dates (roughly 190 grams)
  • 1 tsp pure vanilla extract
  • 3 tbsp mini dark chocolate chips (or simply chop larger pieces of chocolate)

First, you blend the cashews until finely chopped so that it looks like this:

DSCF0435

The lighting is a bit dark, but you get the picture.

Once the cashews are chopped, add in the dates and process until the mixture is a bit sticky and it feels like it will hold together.

*Note: In Angela’s recipe, she mentions to add a tsp of water at a time to create more hold for the mixture. I messed this up a little bit and added too much water, so my mixture was way too sticky. Add in the vanilla extract and process a little bit more.

Once it’s all mixed it will look like this!

DSCF0436

Then you add the best part – the chocolate chips! The Chipits brand was on sale when I went to the grocery store, so I bought 50% cocoa chocolate chips and Reece chocolate chips. This brand does contain milk products, so I would suggest another brand if you are vegan. I mixed the chocolate chips by hand because I thought this would be easier, however because my mixture was so sticky it was quite difficult.

After being in a sticky situation (ha ha), I put my mixture into balls instead of bars because I found this would be the easiest for me. After, you just plop them in the freezer to harden and…

DSCF0440
Voila!

With mine being so sticky, if yours end up that way I suggest to put them in tin foil for traveling or putting them in your lunch.

VERDICT….WIN!

Other than my own fault of putting too much water in the mixture, these are a big win and I highly recommend them. They are a great easy and health alternative to granola bars.

Let me know if you try these, how they turned out, and anything else I could add into them next time!

DSCF0451

You can find the original recipe here: http://ohsheglows.com/2013/01/16/homemade-chocolate-chip-cookie-dough-larabars/